

Editing your website content
Click Edit
Once you click Edit you’ll be taken to the main editing screen to actually edit your content of that particular page.
Each page is broken down into sections. These sections are clearly displayed in order of where they are on the page from top to bottom.
Each section is displayed as a neat thumbnail tile which shows:
- Its icon
- Name or first line of text (max 16 characters)
- Duplicate icon – to duplicate the section
- Show / hide icon – to show or hide the section
- Drag / dots icon – allows you to drag and reorder the section tile
The top shows a large button + Add New Element. Here you can add a new section and within it add new elements.
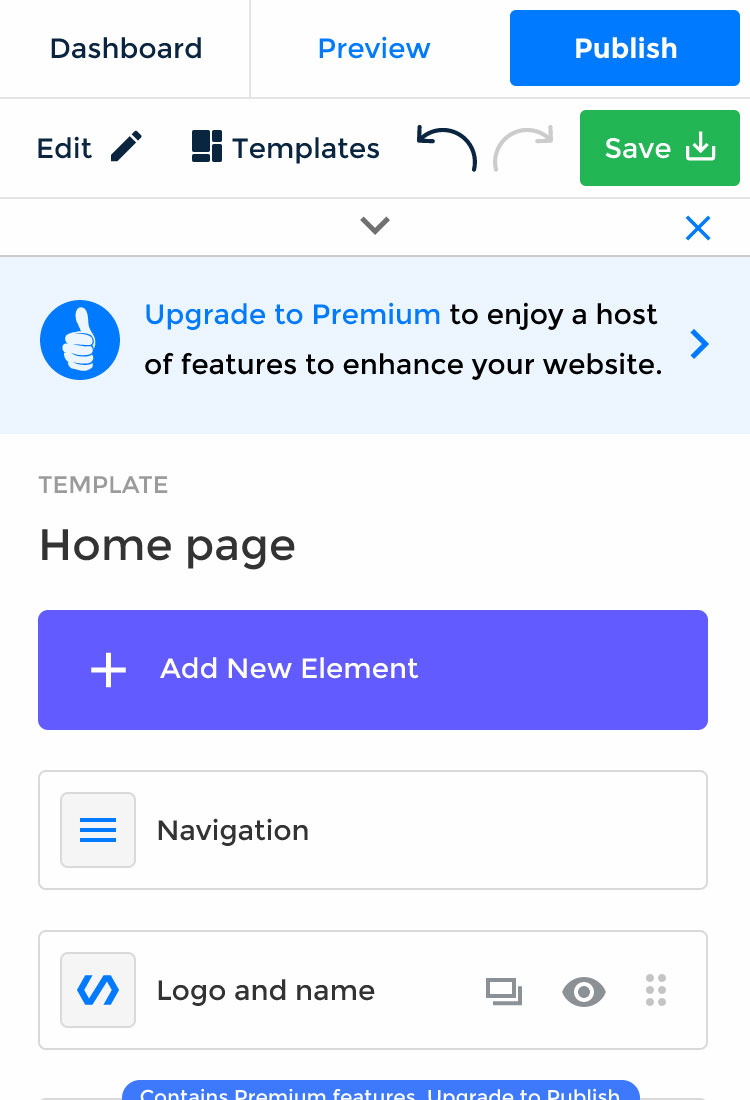
Section thumbnails
Thumbnails for each section are clearly labelled so it’s easy to see what content you want to change.
The sections highlighted in blue warn you this section contains premium feature(s). You’ll have to upgrade to a paid plan in order to show this section after publishing it.

Visual editing
When you click on a thumbnail the screen slides to the editing zone for that content. On mobiles and small devices the screen is split into two so you can see exactly what section of your web page you are editing.
There is an arrow which allows you to expand the editing zone so it’s easier to type and change colours etc.
Removing a section
Inside each section there is the ability to delete / remove the whole section. If you fremove it by mistake you can instantly use the Undo arrow button to rectify this.

Desktop & Tablet
On larger screens the editing area only slides on part of the screen. This allows for a fully visual editing experience. Making it super easy to update and add new elements to your website.
Depending on the size of the screen, as the editing area slides on the actual preview of your website responsively adjusts to the rest of the width available.
